
Introduction
For those of you who don’t know what ProcessWire is (shame on you!), here the introduction statement of the official website:
“ProcessWire is a free PHP content management system and framework (open source CMS/CMF) built to save you time and work the way you do. ProcessWire provides simpler and stronger control over your pages, fields, templates and markup at any scale.”
In my opinion, ProcessWire is one of the most simple and effective tools for building websites, both small and large. It has all the features that you demand from a CMS/CMF. I strongly suggest you to check it out, if you are new to it. But don’t take my word for it, go on the official website and check out what differentiates ProcessWire from the other CMSs.
Why is ProcessWire (PW from now on) the right tool for the job? These are the main reasons:
- It’s easy for everyone! If you are a the developer you will find yourself right at home with its jQuery-style API. Just a basic knowledge of PHP is required to get you up and running. If you are a designer you will be amazed of how much freedom PW offers. YOU have the control over the markup, not the CMS. You can forget tweaking CSS styles after adding a new plugin.
- Total control of your data. You define the fields you need and how they relate with each other. The heavy lifting is left to the framework.
- Modular architecture which is easy to extend. It sounds like a cliché, but for PW it’s really true.
- Ideal for clients because it’s intuitive, even for non-technical people.
- Friendly community with hundreds of contributions.
We will review these points throughout the post, as we build each section of the website.
What are we building?
In this post I will guide you, step-by-step, through my personal workflow for building a simple website with ProcessWire. I will assume from you a basic knowledge of HTML and PHP. Moreover I’m not going into the look-and-feel of the front-end, because that part is up to your personal taste, you can use whatever theme you are comfortable with.
For this example we are going to build a website for a Ski School.
The following is a list of the basic requirements of our website:
- Multi-language website, with Italian, English and German translations
- Some basic pages with no interaction (About Us, Courses, Prices, etc.)
- Contact Page
- News section
- Photogalleries
- Instructors management with categories (Ski, Snowboard, etc.) to allow filtering
Install
Go on the downloade page and get a fresh copy of PW. At the time of writing the latest stable version is the 2.7.2, so I’m going to use that one. Alternatively you can clone the GitHub repo.
Extract the content of the archive in a folder on your local webserver, then create a new MySQL database using your favorite tool.
Finally visit your site to start the installation process. The PW installer lets you choose a site profile that helps you to start. Currently there are 5 site profiles:
- Default (beginner edition): minimal and responsive profile that is a good starting point for new sites.
- Default (intermediate edition): is almost identical to the beginner edition, except that it focuses on using alternate and more advanced strategies for template files.
- Multi-Language: a multi-language version of the default site profile (intermediate edition).
- Blank: it includes the minimum pages, fields and templates to get you started.
- Classic: the default site profile from PW version 2.0 to 2.4.
We are going to use the Multi-Language profile. Using the installer you can check the framework’s requirements, fill the necessary information (database credentials, administrator email and password, etc.) and build your own working directory.
Folder Structure
When you are done with the installation we can check the folder structure of PW:
+---site            # files specific to your site
|   +---assets
|   |   +---cache   # cached files
|   |   +---files   # uploads (file, images), translations and so on
|   |   +---logs
|   |   \---sessions
|   +---modules     # site-specific modules or plugins
|   +---templates   # business logic
|   \---config.php  # site configuration
\---wire            # ProcessWire directory
    +---core
    +---modules
    \---templates-admin
The site folder contains all the files of your website, while the wire folder contains the PW framework. If you look carefully you will notice that both folders contain a subdirectory called modules. In fact the CMS itself, due to its modular architecture, is composed by a group of modules built on top of the ProcessWire framework. The development process takes place in the site directory, you should NEVER touch the wire folder.
Key concepts of ProcessWire
Before diving into the code, we have to take a step back and explore the key concepts of PW in order to have a better understanding on how to build things. These concepts are essentially the blocks that PW offers for building every site. They are:
- Fields
- Templates
- Pages
Fields
“Fields can be as simple as containing raw text or numbers, or more complex like rich text editors, page-to-page relations and fields that hold files or images.”
Fields are containers of data. For example a basic webpage, like this one, has a title, an image header and a body with few images in it. In PW you can manage this data by assigning the title to a TextField, the header image to an Image field and the body to a Textarea with HTML support. In this way you can interact with your data in the PW administration interface and in the front-end using the fluent API.
Templates
Templates are the PHP files that contain the logic and the output of your pages. They can be as simple as a plain HTML file, or they can be as complex as as an entire PHP application. However in most of the cases templates contain HTML with PHP tags inserted where necessary to output content from ProcessWire. Each template is assigned one or more fields that represent the data structure applied to it’s pages.
In PW you can also use templates without a file, if you don’t need to output data. However don’t worry about it yet, we will cover this topic later in the post.
Pages
The Page is the main concept of PW. While in most of the cases a Page is most commonly representative of a page on your site, they may also be used as data containers for anything else (similar to a node in Drupal). Pages let you define almost anything in your website, including their relationships with other pages.
“Any given pages may cross reference each other in a one-to-one or one-to-many relationship. This gives ProcessWire the ability to function like a relational database on top of a CMS.”
Thanks to the hierachical structure in the backend, a page’s path (or URL) always relates directly to it’s placement in the structure, which helps maintaining your site organized and accessible.
To sum up, we remind the relationships between PW building blocks:
- Each field holds a specific type of data.
- Each template has assigned one or more fields.
- Each page uses a template (which may or may not have a physical file) to build the document.
Let’s start!
Development configuration
The first thing I suggest you to do is to duplicate the config.php in the /site folder and call the new copy config-dev.php. In this file you can tweak the PW environment for your development machine, so you can keep the original config.php for production. In the dev version, change the database configuration to match the one you’re using locally and edit the following lines:
<?php

$config->debug = true;
$config->httpHosts = array('localhost');

?>
The first is used to enable debug mode in PW while the second adds localhost to the HTTP Hosts Whitelist.
Finally log into the administration interface of PW using the URL and the credentials defined in the installation process. Once logged in, take your time to discover each section of the admin.
Language configuration
Next, you have to define the languages of your site. The multi-language profile of PW comes with English (as default), German and Finnish. I’m going to use Italian as the default language, and replace Finnish with English.
Go to “Setup > Languages” and edit each field to match your needs. In my case I have the following setup:
| Name | Title | Core Translation Files | Site Translation Files |
|---|---|---|---|
| default | Italian | 0 | 0 |
| de | German | 0 | 0 |
| en | English | 0 | 0 |
The default language must have default as name, you can’t change it.
The column Core Translation Files refers to the translations of the PW administration interface and its modules. You can grab one of the language packs available from the PW website and upload directly in the language page, to automatically translate all the phrases.
The column Site Translation Files instead refers to the translation of your website on the front-end. For now don’t worry about it, we will return on this later in the second part.
Identify our templates
The most important step in this section is to identify the templates of our site. Generally in a website you have multiple pages, some of them are unique in their structure (i.e. the Home Page, the Contact Page), while the others (i.e. About Us, What we do?, etc.) have the same structure and fields (generally title, body and images) and therefore they are instances of the same PW template. Keep in mind this concept as it is essential to understand how PW works.
Now we can identify the pages (that later will be assigned to templates) which are needed in the site to match our requirements listed above. Then we will reason about the fields that will contain the data for those pages.
- Home Page: the main page of the site (the root)
- Basic Page: a page with nothing else than a body and images
- Contact Page: a page with a Contact Form, a few contact information and a map
- News Index Page: an index of all the news, possibly paginated
- News Page: for a single news
- Photogallery Index Page: an index of all the photogalleries of the site
- Photogallery Page: a single photogallery
- Instructors Index Page: an index of all the Ski instructors
- Instructor Page: a single Ski instructor with all of his information
It should be enough for now.
Next we have to identify the fields for each page, focusing on their types and marking the ones that should be translatable:
Home Page
- title (simple text, multi-language)
- body (HTML with images support, multi-language)
- images (translate descriptions and alt attributes)
Basic Page
- title
- header image (single image with size constraints)
- body
- images
Contact Page
- title
- body
- map (Google map)
Notice: we could hard-code the map in our template, as the location of the Ski School is not a value that is going to change frequently over time, however as a proof of concept we want to manage this field in the administration interface.
- News Index Page
- title
- body
In this page, as well as in the other “indexes”, we are going to use the PW APIs to retrieve all the News pages and display them paginated.
News Page
- title
- date (a field to store the publication date)
- body
- images
Photogallery Index Page
- title
Photogallery Page
- title
- body
- images
Instructor Index Page
- title
- body
Instructor Page
- title
- photo (a single image)
- body
- categories (multi-lanugage)
- languages (multi-lanugage)
We have to inspect a little bit this last page: title, photo and body fields are straightforward, but what about categories and languages? In our site we want to be able to add one or more categories (Ski, Snowboard, Carving, etc.) to each instructor, so we can filter them by their categories i.e. using the URLs /categories/ski or /categories/snowboard and so on. For this purpose we have to add two new pages:
Instructor Category Index Page
- title
Instructor Category Page
- title
We will tell PW to use the Instructor Category Index as a parent page and the Instructor Category as child pages, so that the hierarchical distinction is reflected also on the front-end.
Finally what about the instructor languages? In this case we don’t want to filter the instructors by their spoken languages, however we still need a way to manage them (create/edit/delete) in the back-end, and a field in the Instructor Page to reference them. For this purpose we are going to create two templates without an associated template file, which basically means that they cannot display any resulting page directly. Exactly the behaviour that we want.
Instructor Language Index Page
- title
Instructor Language Page
- title
- icon (single image field)
Like categories, we will use the Instructor Language Index Page as parent and Instructor Language Page as child pages.
By doing so, we can establish two different “one-to-many” relationships: the first one between the Instructor Page and the Instructor Category Page (using the categories field) and the second one between the Instructor Page and the Instructor Language Page (using the languages field). The type of field that allows this behaviour is the Page field.
Build templates and fields
Templates
Now it’s time to add the templates. Create the following PHP files (some of them may already be present) in the /site/templates folder:
home.php
basic-page.php
contact-page.php
news-index.php
news.php
gallery-index.php
gallery.php
instructor-index.php
instructor.php
instructor-category-index.php
instructor-category.php
Then go to “Setup > Templates > Add New”. PW will detect the new files and it will offer you to use them. Select all of them and click “Save”.
Fields
Next, before editing the details of each template, we have to create our data fields. Go to “Setup > Fields” and add the following fields (some of them may already be present), accordingly to the table:
| Name | Label | Type | Icon |
|---|---|---|---|
| title | Title | PageTitleLanguage | - |
| body | Body | TextareaLanguage | File text o |
| images | Images | Image | Picture o |
| categories | Categories | Page | Folder open o |
| langs | Languages | Page | Comments o |
| date | Date | Datetime | Calendar |
| header | Header | Image | Picture o |
| photo | Instructor Photo | Image | Picture o |
| icon | Language Icon | Image | Picture o |
A couple of notes here:
- For each field I suggest you to choose a Font Awesome icon (use the last column as a reference) to help you identify it. You can find the icon selector them under the “Advanced” tab of each field.
- Use “CKEditor” as Inputfield Type for the body field and “Markup/HTML with image management”1 as Content Type. All these options are available under the “Input” tab.
- For the categories field, under the “Input” tab, select
instructor-categoryas template of selectable page(s) and “Checkboxes” as Input Field type. For a few entries this option is sufficien. Do the same for the field langs2 and selectinstructor-languageas template of selectable page(s). - The header, photo and icon fields should contain each one only a single file, therefore type 1 in the Maximum allowed files box in the “Details”. Optionally for each one, type your minimum width and height image size in the “Input” tab. You don’t want, for example, an overscaled image as header, do you?
- For the language icon field instead, define the maximum size for the image.
Tweak the other settings as you like and explore all the different customizations that PW allows for all your fields.
Warning: probably you noticed that a few fields are missing, i.e. the map field. We will add them later, because we need to install a plugin to get that feature.
Assign fields to templates
Finally we will go back to our templates, to add the newely created fields to each template and to tweak some settings.
Go to “Setup > Templates” and for each one of your templates add the corresponding fields using the “Base” tab. You can drag and drop each field in the order that you want them to appear in the administration panel when you create new pages. Like before, I suggest you to choose a Font Awesome icon to help you identify each template.

Refer to the table below for my configuration.
| Name | Label | Fields | Icon |
|---|---|---|---|
| basic-page | Base Page | title, header, body, images | File o |
| contact-page | Contact Page | title, body | Envelope o |
| gallery | Gallery | title, body, images | Image |
| gallery-index | Gallery Index | title | List |
| home | Home | title, body, images | Home |
| instructor | Instructor | title, body, images, categories, langs | User |
| instructor-category | Instructor Category | title | Folder open o |
| instructor-category-index | Instructor Category Index | title | List |
| instructor-index | Instructor Index | title, body, header | Users |
| instructor-language | Instructor Language | title, icon | Comment o |
| instructor-language-index | Instructor Language Index | title | List |
| news | News | title, header, body, date, images | File text o |
| news-index | News Index | title | List |
| search | Search | title | Search |
A couple of notes:
- Don’t worry now about the “Access” tab, we will explore those options later in the second part of this post.
- Optionally you can tag each one of your templates to group them visually in the list.
- You can define for each template the relationship with other templates. For example the
instructor-indextemplate can have only child pages with theinstructortemplate, so you can define this relationship in the “Family” tab. The same applies forinstructor-category,instructor-languageandnews. Moreover, for each child template you can define the allowed template(s) for parents. - You can also define whether pages created using a defined template may or may not have children. For example you probably don’t want to add sub-pages to the
newspages or to thegallerypages (unless you want sub-galleries, but we should keep things as simple as possible). - You can tell PW that a specific template cannot be used for new pages. An example is the
hometemplate, but you can apply this setting also to thesearchandcontact-pagetemplates, because you need one and only one page instance of those templates. - For the pages that need pagination (namely
news-index, but you can apply pagination also the the index of galleries) you need to check the option Allow Page Numbers in the “URL” tab. On the front-end you will be able to navigate between the pages using URLs in the form /news/page1, /news/page2 and so on. You can override this setting by using the following instruction in yourconfig.php
<?php

$config->pageNumUrlPrefix = 'page';

?>
If you look carefully you will notice that under the “File” tab of each template there is an option called “Disable automatic append of file: init.php”.
PW can optionally prepend and append different PHP files to each template to perform additional tasks or add more logic. For example, in the prepend file, you could add the logic that generates the navigation menu, which must be available on all the pages. Instead of writing the same code over and over in each template, you can add this functionality to a single file that gets prepended before rendering the page on of every request. By default PW uses a prepended file called _init.php in /site/templates, but you can configure this behaviour for the entire site by editing your config.php file, specifically these rows:
<?php

$config->prependTemplateFile = '_init.php';
$config->appendTemplateFile = '';

?>
Then you can override these values for each one of your templates in the “Files” tab. For this tutorial however we are going to use only the prepended _init.php file3 for all our templates. In this file we are going to write the logic for all the elements that are needed on every page: the navigation menu, the language switcher, the footer menu and the minification of stylesheets and scripts.
Modules
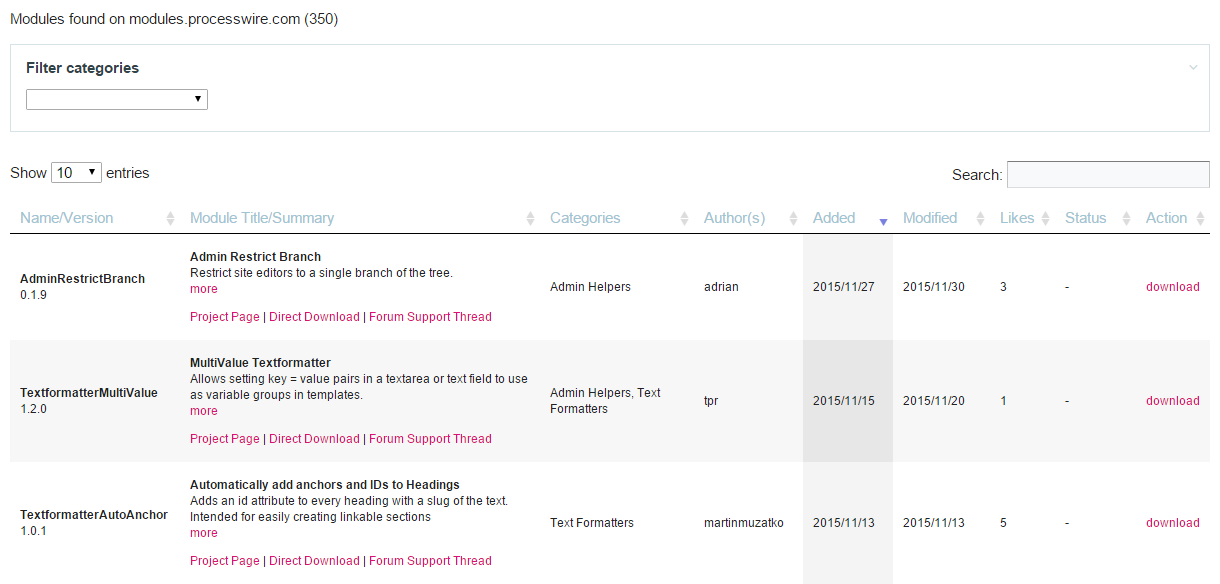
The friendly community of PW has made sensational contributions to the framework by creating hundreds of modules/plugins that extend the base functionality of the CMS. The module directory is not as large as the Wordpress one, but probably contains everything to cover your needs.
In my opinion, these are the essential modules that you need on every site built with PW:
- Modules Manager by soma: enables you to browse the modules directory on modules.processwire.com, download, install or update them without browsing manually the modules webpage.
- AIOM+ (All In One Minify) for CSS, LESS, JS and HTML by david-karich and conclurer:is a module that improves easily the performance of your website. By a simple function call Stylesheets, LESS and Javascript files can be parsed, minimized and combined into one single file.
- Hanna Code by ryan: insert any complex HTML, Javascript or PHP output in your ProcessWire content by creating your own Hanna code tags. Recalls the shortcode functionality in Wordpress.
- Markup SEO by nico: the all-in-one SEO solution for ProcessWire.
- Markup Simple Navigation by soma: a module to render simple nested ul tree of the site structure.
- Map Marker by ryan: this Fieldtype holds an address or location name, and automatically geocodes the address to latitude/longitude using Google Maps API.
- Template Engine Factory by wanze: this module helps separate logic from markup. It turns ProcessWire templates into controllers which can interact over a new API variable with various template engines like Smarty, Twig or Jade. Any template engine can be added to the factory as separate module.
First install the Modules Manager module in your site. You can read the documentation about the different ways to install/unistall modules. Then you can install all the other modules directly from the back-end by using the module. If you feel confident enough you can obviously skip this step and install each module manually. It’s a good way to go if you want also dig into the modules files to learn how they work under the hood.
When all the modules are installed, you have to edit their configuration to match your needs. I’m not going into the details of each module as they are covered enough in the modules directory and in their dedicated topics on the support board. Moreover each module has its own GitHub page where you can ask for help or report bugs.
Just for completeness I’m reporting here the configuration options (that differ from the default ones) for each module:
- AIOM: use the Development mode in development.
- Markup SEO: the templates with the SEO tab are
basic-page,contact-page,gallery,gallery-index,home,instructor,instructor-index,instructor-category,instructor-category-indexnewsandnews-index. Fill the others fields as you like, but use the manual method to insert the generated code. Also remember that by default this module is configured with just one language. To support multiple languages you have to change the fieldtypes of the SEO fields manually, as explained by the section “Multilanguage” on the module’s page. For most of our needs we just need to change the seo_title, seo_description and seo_keywords into TextLanguage fields.
To use the Map Marker module we need to add a new field. Go to “Setup > Fields” and click “Add New”. Call the new field “map”, select “MapMarker” from the type and use “Map” as label and “Map marker” as icon. Then assign it the contact-page template under the “Actions” tab. Finally use your preferred options under the “Input” tab.
The last module in the list is called Template Engine Factory and in my opinion it is essential to every site.
“The goal of this module is to implement the MVC pattern as simple as possible. The ProcessWire template files under
/site/templates/can act as controllers, containing pure logic. A controller delegates the output/markup to a corresponding template file. This delegation is abstracted by the module so that any template engine can be used by the developer.”
The MVC (Model-View-Controller) pattern, for those of you who are not familiar with, is an architectural pattern, commonly used in Object Oriented Programming, that enforces the separation between the presentation logic and the business logic. With this module the separation is achieved by using PW pages as Models, template files as Controllers and view files as Views. This module allows us to use one of the available template engines4 that ships with it: ProcessWire (default), Twig, Smarty and recently Jade.
Using a template engine has several benefits, as we will discover later in the coding process. By now the Wikipedia entry lists the following:
- encourages organization of source code into operationally-distinct layers (see e.g., MVC)
- enhances productivity by reducing unnecessary reproduction of effort
- enhances teamwork by allowing separation of work based on skill-set (e.g., artistic vs. technical)
You can read more about this module in its dedicated page or on the support board. For now you have to remember the following
“For each controller that is outputting markup, a corresponding template file should exist (in the template files directory configured per engine). The default convention is that the template file has the same name as the controller (aka ProcessWire template). […] The factory tries to load the template file of the current page’s controller or the global template file. If a template file is found, an instance of it is accessible over the API variable. If no template file is found, the factory assumes that the controller does not output markup over the template engine. In this case, everything works “normal”.”
Go ahead and install your preferred TemplateEngine module using the Modules Manager or manually.
Notice: Twig is easier than the others, but it doesn’t support caching. Also note that the ProcessWire template cache should NOT be active, because now controllers do not output any markup.
In this example I’m going to use Smarty, but you can choose whatever you want, the syntax is slightly different, but in most of the cases the functionalities are the same.
After installing the module you have to create a new folder in /site/templates, called views. That directory will contain all of your view files. Finally switch to the module configuration and use the following values:
Template Engine Factory
- Use “Smarty” as Template Engine
- Use
viewas API variable
Template Engine Smarty
- Use
templates/views/as Path to templates - Use `tpl`` as Template file suffix so you can use code highlighting features in your IDE
- Leave “Global template file” blank because Twig, Smarty and Jade support template inheritance on their own
- Leave
0in Smarty caching lifetime - Finally check “Import ProcessWire API variables” and “Enable Smarty’s compile check”.
- Use
That’s it for now! In the second part we will finally start to get our hands on template files to actually code our website. Stay tuned!
The option “Markup/HTML with image management” allows PW to solve a few problems when working with rich text editors. See Quality assurance for images in rich text fields for more information. ↩︎
languages is a reserved word in ProcessWire. ↩︎
This file will act as a simplified view composer, if you are familiar with Laravel. ↩︎
A Template engine is an additional software layer that combines one or more templates with a data model to produce one or more result documents. ↩︎