
Introduction
React Native FBSDK is a wrapper around the iOS and Android Facebook SDK which allows for Facebook integration in React Native apps. It allows to access to native components, from login to sharing, entirely through documented JavaScript modules so you don’t have to call a single native function directly.
I thought that setting it up would be quite simple but unfortunately I was wrong! It is a little bit complicated to get it running and you have to figure out by yourself the mess that is Facebook’s documentation.
In this post I will try to provide the correct setup for Facebook SDK on a React Native app and create a login page that uses FBSDKLogin API.
Note: For the purpose of this project, instructions below are specifically for Android. I also assume that your dev environment is correctly setup with the Android SDK and a functional emulator.
First steps
First follow the instructions on the React Native getting started guide and the React Native Android configuration page:
1. Create React Native project
First create a React Native project using the following command:
react-native init YourApp2. Install JavaScript packages
Install and link the react-native-fbsdk package:
react-native install react-native-fbsdkNotice:
For some unknown reason I was not able to make it work using only this command, so I had to install the SDK using npm install --save react-native-fbsdk and later manually link it to the application, as we will see later.
3. Configure native projects (for react-native version 0.29 or above)
Go to MainApplication.java and MainActivity.java under app/src/main/java/com/<project name>/ to complete setup.
In MainApplication.java
- Add an instance variable of type
CallbackManagerand its getter.
import com.facebook.CallbackManager;
import com.facebook.FacebookSdk;
import com.facebook.reactnative.androidsdk.FBSDKPackage;
import com.facebook.appevents.AppEventsLogger;

...

public class MainApplication extends Application implements ReactApplication {

  private static CallbackManager mCallbackManager = CallbackManager.Factory.create();

  protected static CallbackManager getCallbackManager() {
    return mCallbackManager;
  }
  //...
- Override
onCreate()method
@Override
public void onCreate() {
  super.onCreate();
  FacebookSdk.sdkInitialize(getApplicationContext());
  // If you want to use AppEventsLogger to log events.
  AppEventsLogger.activateApp(this);
}- Register sdk package in method
getPackages().
private final ReactNativeHost mReactNativeHost = new ReactNativeHost(this) {
  @Override
  protected boolean getUseDeveloperSupport() {
    return BuildConfig.DEBUG;
  }

  @Override
  protected List<ReactPackage> getPackages() {
    return Arrays.<ReactPackage>asList(
      new MainReactPackage(),
      new FBSDKPackage(mCallbackManager)
    );
  }
};
Then in MainActivity.java
- Override
onActivityResult()method
import android.content.Intent;

public class MainActivity extends ReactActivity {

    @Override
    public void onActivityResult(int requestCode, int resultCode, Intent data) {
        super.onActivityResult(requestCode, resultCode, data);
        MainApplication.getCallbackManager().onActivityResult(requestCode, resultCode, data);
    }
    //...
At this point you need to set up a new Facebook App. Follow the documentation at this link and set all your information. This is a well documented process so I’m going to skip it.
Next, the fastest way to proceed is to follow the Android Quick start page
Add Facebook SDK to Your Project
If you installed successfully the React Native FBSDK using the command
react-native install react-native-fbsdkyou can skip over to the next step, as reported in the documentation:
Before you can run the project, follow the Getting Started Guide for Facebook Android SDK to set up a Facebook app. You can skip the build.gradle changes since that’s taken care of by the rnpm link step above, and the step of calling FacebookSdk.sdkInitialize. But make sure you follow the rest of the steps such as updating strings.xml and AndroidManifest.xml.
Otherwise (like in my case) you need to manually link the SDK to your React Native app.
1. Add the SDK to gradle
Open settings.gradle in the android folder of you project and add the following
include ':react-native-fbsdk'
project(':react-native-fbsdk').projectDir = new File(rootProject.projectDir, '../node_modules/react-native-fbsdk/android')
2. Include the SDK to the compiling process
Open build.gradle in the android/app folder of your project and add the following line inside the dependencies section
compile project(':react-native-fbsdk')Now you can follow along the Quick Start
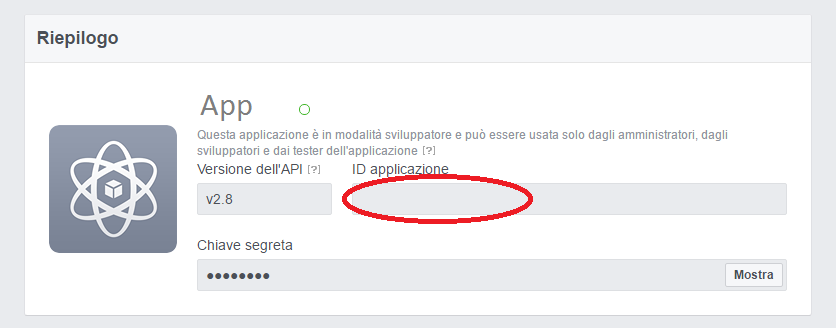
Add Facebook App ID
Add your Facebook App ID to your app and update your Android manifest.
- Open your
strings.xmlfile, for example:/app/src/main/res/values/strings.xml. - Add a new string with the name
facebook_app_idcontaining the value of your Facebook App ID<resources> <string name="app_name">App</string> <string name="facebook_app_id"><YOUR_APP_ID></string> </resources>
<uses-permission android:name="android.permission.INTERNET"/><application android:label="@string/app_name" ...>
...
<meta-data android:name="com.facebook.sdk.ApplicationId" android:value="@string/facebook_app_id"/>
...
</application>Tell us about your Android project
You need to inform Facebook of your Package Name and Default Activity Class Name. You can find these information in the file AndroidManifest.xml mentioned before. Usually they are like the following
- Package Name:
com.<your namespace> - Default Activity Class Name:
com.<your namespace>.MainActivity
Add your development and release key hashes
To ensure the authenticity of the interactions between your app and Facebook, you need to supply Facebook with the Android key hash for your development environment.
- On Mac you need to run this command
keytool -exportcert -alias androiddebugkey -keystore ~/.android/debug.keystore | openssl sha1 -binary | openssl base64- On Windows
keytool -exportcert -alias androiddebugkey -keystore %HOMEPATH%\.android\debug.keystore | openssl sha1 -binary | openssl base64If keytool is not found in your PATH you need to run the command from the bin directory of your JDK (probably you can use %JAVA_HOME%\bin). Also if openssl is not present on your Windows machine, you need to download it at this link
Finally you can use one of the examples provided by the Facebook SDK, for instance the Facebook Login is as simple as the following:
const FBSDK = require('react-native-fbsdk');
const {
  LoginButton,
  AccessToken
} = FBSDK;

var Login = React.createClass({
  render: function() {
    return (
      <View>
        <LoginButton
          publishPermissions={["publish_actions"]}
          onLoginFinished={
            (error, result) => {
              if (error) {
                alert("login has error: " + result.error);
              } else if (result.isCancelled) {
                alert("login is cancelled.");
              } else {
                AccessToken.getCurrentAccessToken().then(
                  (data) => {
                    alert(data.accessToken.toString())
                  }
                )
              }
            }
          }
          onLogoutFinished={() => alert("logout.")}/>
      </View>
    );
  }
});