
Introduction
In this Post we will look on how to implement the PW modules introduced in Part 1. Let’s recap them:
- MarkupSimpleNavigation: to generate the main navigation menu
- AIOM: to concatenate, minify and cache our assets
- MarkupSEO: the SEO solution for PW
- MarkupGoogleMap: to embed a Google Map on your pages
- ProcessSlider: to create image sliders for your pages
- ProcessHannaCode: to insert any complex HTML, Javascript or PHP output in your ProcessWire content
There are a few methods to install PW modules. For each module you can download the corresponding ZIP archive from the modules directory on the PW website. Then you have to extract the content in a folder, named after the module class, in the /site/modules directory. Otherwise you can use the Modules Manager to browse modules directly from your website. However my favourite method is simply to add the module straight from the directory by writing the Module Class Name in the New tab of the Modules administration panel.
MarkupSimpleNavigation
- Module Page
- Forum Page
- Class Name: MarkupSimpleNavigation
- Folder:
/site/modules/MarkupSimpleNavigation/
This module does not require any configuration, therefore you can just drop the code into _init.php, which is the file that, following the conventions of this PW tutorial, gets prepended to each template and is available to each page of your website. You can start from this code and adapt the settings to your needs:
<?php

$view->set('menu', $modules->get("MarkupSimpleNavigation")->render(array(
    'parent_class' => 'nav',
    'current_class' => 'active',
    'has_children_class' => '',
    'levels' => false,
    'levels_prefix' => '',
    'max_levels' => 2,
    'firstlast' => true,
    'collapsed' => false,
    'show_root' => true,
    'selector' => 'template!=instructor',
    'outer_tpl' => '<ul id="menu-top-menu" class="menu clearfix">||</ul>',
    'inner_tpl' => '<ul class="sub-menu">||</ul>',
    'list_tpl' => '<li%s>||</li>',
    'list_field_class' => 'menu-item',
    'item_tpl' => '<a href="{url}">{title}</a>',
    'item_current_tpl' => '<a href="{url}">{title}</a>',
    'code_formatting' => false,
    'debug' => false
)));
As you see we are setting a variable menu with the HTML generated by the render function of the module. Most of the configuration options are self-explanatory so you can just play with them to find your preferred result. However I want you to note the selector option, used to filter the page tree. For example you don’t want to list all the instructors or all the news inside the menu, so you can use the power of PW selectors to exclude certain pages.
If you are building complex menus, in production mode you can decide to use the MarkupCache module to cache the result of the render function. In this case, for obvious reasons, you should avoid the use of CSS classes to identify the active page and instead, use a Javascript solution for example.
AIOM
- Module Page
- Forum Page
- Class Name: AllInOneMinify
- Folder:
/site/modules/AllInOneMinify/
This module can easily improve the performance of your website by parsing, minifying and combining Stylesheets, LESS and Javascript files. The module offers different configuration options, which are well documented in the module’s page, so in this case I will focus only on how to use the module in the code. In the _init.php file just add the following:
<?php

$view->set('aiom_css', AIOM::CSS(array(
    'plugins/fancybox/jquery.fancybox.css',
    'styles/font-awesome.min.css',
    'styles/styles.css'
)));

$view->set('aiom_js', AIOM::JS(array(
    'plugins/jquery.1.7.min.js',
    'plugins/fancybox/jquery.fancybox.pack.js',
    'plugins/isotope.min.js',
    'plugins/hoverIntent.js',
    'plugins/nicescroll.min.js',
    'scripts/scripts.js'
)));
In this case, as you can see, we are using the AIOM module respectively on bare CSS styles and Javascript files. Each function call combines an array of files into a single minified version.
Notice:
AIOM is clever enough to exclude from the minification process the files that have the abbreviation .min or -min at the end of the file name and before the file extension.
Later in your template you can use the URL of these files. In the <head> tag:
<link rel="stylesheet" href="{$aiom_css}" />and the following in the end of the document, just before the </body> tag
<script type="text/javascript" src="{$aiom_js}"></script>Remember to disable the Development mode while using the site in production.
MarkupSEO
- Module Page
- Forum Page
- Class Name: MarkupSEO
- Folder:
/site/modules/MarkupSEO/
The MarkupSEO offers a complete SEO solution for PW. This module adds a few fields to your PW site:
seo_titleseo_keywordsseo_descriptionseo_canonicalseo_imageseo_custom
Before editing the configuration, if your site uses multiple languages you have to change the fieldtype of theseo_* fields for which you want to support more languages. For most of the cases you can just change the Type of seo_title, seo_keywords and seo_description from Text to TextLanguage.
In the configuration page you can choose the templates which should get a SEO tab. As a general rule you should select every template that has a physical file associated with it. Next you should fill at least the author, the site name and the title format. Then set the manual method to include the generated code.
Next, in the <head> tag of your template, you can just render the HTML using this code:
{if $page->seo}
    {$page->seo->render}
{/if}
The if statement just checks that the seo_* fields are available on the page before rendering the code.
MarkupGoogleMap
- Module Page
- Forum Page
- Class Name: FieldtypeMapMarker
- Folder:
/site/modules/FieldtypeMapMarker/
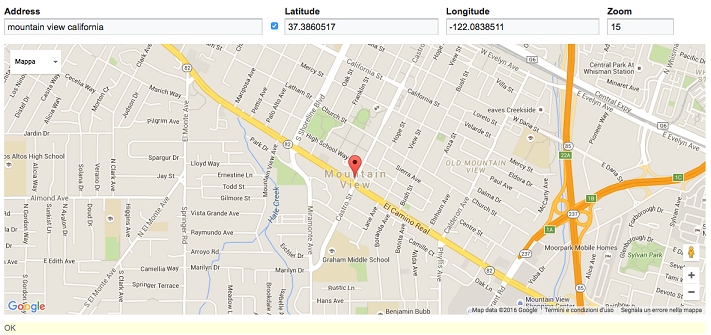
This module holds an address or location name, and automatically geocodes the address to latitude/longitude using Google Maps API.
After installing the module you have to add a new field to your PW website. For example call this field map and choose MapMarker from the Type dropdown. From the Input tab you can select the default values for your fields and optionally add an icon. Then you have to add this field to a template: just click on the Actions tab and check the box next to the contact-page template. Finally you can edit your Contact Page to add the location of the Ski school.
The code to render the Map Field on the view file is really straigthforward. First add the module to a variable in the contact-page.php controller
<?php

$view->set('map', $modules->get('MarkupGoogleMap'));
then you just have to add the variable to the content-page.tpl view file:
{extends "template.tpl"}

{block "styles"}
    <script type="text/javascript" src="https://maps.googleapis.com/maps/api/js?sensor=false"></script>
{/block}

{block "content"}

    <div id="map-container">
    	{$map->render($page, 'map')}
    </div>

    [...]
ProcessSlider
- Module Page
- Forum Page
- Class Name: ProcessSlider
- Folder:
/site/modules/ProcessSlider/
This module, actually written by me, allows you to easily insert Jssor Sliders in your ProcessWire pages. It offers a visual tool to build image sliders with complex effects and animations. Probably for most of the sites (at least in my case), the use of this tool is an overkill because it’s unlikely that an image slider, once defined, is going to change that often. However for those of you that miss Wordpress plugins like Nivo or Revolution Slider, this module could be useful.
Follow carefully the installation instructions and then navigate through Setup > Process Slider to go to the builder. After creating your first slider, called for example home_slider, add a new field to your PW website. Call it image_slider and select the Slider type from the dropdown. Finally add this new field to the Home template. Now you can just edit your homepage and select your home_slider from the dropdown.
The use of the module in the code is really easy. Edit your home.php template file:
<?php

$view->set('slider', $modules->get('MarkupSlider'));
Next we can display the slider in our view home.tpl in the following way:
{extends "template.tpl"}

{block "styles"}
    {$slider->getStyles(true)}
{endblock}

{block "content"}
    <div id="slider">
    	 {$slider->render($page->image_slider, true)}
    </div>

    [...]
The first row in the styles section extracts the styles of the Jssor plugin. The function actually accepts two boolean parameters, to also include the styles for the arrows and the bullets.
Next, in the content we can render the slider using the render function, which accepts the ID of the slider (stored in the image_slider field defined before. The second argument forces the module to include also the required Javascript files, otherwise you should add them manually.
Please drop me a line if you find any bugs.
ProcessHannahCode
- Module Page
- Forum Page
- Class Name: TextformatterHannaCode
- Folder:
/site/modules/TextformatterHannaCode/
From the description:
Easily insert any complex HTML, Javascript or PHP output in your ProcessWire content by creating your own Hanna code tags.
This module is for those of you (and me) that miss a functionality similar to Wordpress shortcodes. It allows you to use in a WYSIWYG editor, shortcodes like [[hello_world]] to display complex content on your pages. In this case we will use a shortcode to include a gallery at the bottom of one of our pages. Be sure to have at least one gallery on your website before starting.
After installing the module you need to add the Hanna Code Text Formatter to the body field, otherwise your shortcode will not going to be translated into the corresponding content. Next you can define your Hanna codes in Setup > Hanna Code. Add a new entry named gallery and choose the PHP type. In the attributes textarea add id because we want to pass the ID of the gallery to our shortcode. Finally switch to the Code tab and drop the following
<?php

if(isset($id)) {
    $gallery = $pages->get($id);

    if(count($gallery) && $gallery->template->name == 'gallery') {

        $out = '<div class="images-index">';

        foreach($gallery->images as $image)
        {
            $out .=
                '<div class="images-item">
                    <a href="'. $image->url .'" title="'. $image->description .'" class="fancybox" title="'. $image->description .'">
                        <img src="'. $image->size(255,160)->url .'" class="thumbnail img-responsive" />
                    </a>
                </div>';
        }

        $out .= '</div>';

        echo $out;
    }
}
The code is really simple and by now you should have enough confidence to understand it by yourself. In short it checks that the $id attribute is present and that the $gallery page exists, before iterating through its images, building the markup. Finally you can edit the body of your desired page and insert the shortcode [[gallery id="1"]] to see the content magically appear in the frontend.
Be sure to properly set the permissions for your users because the use of PHP in body fields could have serious implications for the point of view of security. Hanna codes are meant for definition only by superusers.
Translations
In ProcessWire it’s really easy to translate static text into multiple languages. Take a look at the documentation for Code Internationalization to have an overview of how it works. For now let’s just say that you have two different ways to mark a string for translation:
- When your translation needs occur outside of a class–such as in a template file–you must use the
__('string')function call. - When your translation needs occur within a Processwire class – such as in a plugin module – it is preferable (though not required) to use
$this->_('string').
For a standard PW installation you can just drop multiple __('string') throughout your templates, then move to Setup > Languages, select your desired language and click to Translate File to list all the files specific to your website and translate them directly in the PW administration panel, thanks to the ProcessLanguageTranslator core module.
Unfortunately using the TemplateEngineFactory module, along with TemplateEngineSmarty introduces additional complexity for the translation process because PW is not able to detect translatable strings inside *.tpl files. If you don’t want to struggle with different configurations you might consider Twig or even PHP as template manager, because it might be easier to implement translations. However if you are keen to explore new solutions and you want to understand how PW works under the hood, read on because at the end of the following paragraph there could be a solution.
Analyze the translation process
Skip this section if you are a TL:DR type of person.
The first solution I came up with was to slightly hack the core of PW (I know, it’s a bad practice, but still it’s a good exercise for better understand how the things work), specifically the ProcessLanguageTranslator.module inside wire\modules\LanguageSupport. This is the module that handles the page at the URL processwire/setup/language-translator/. Around line 549 I changed the following code:
<?php

// from this ->
if($ext != 'php' && $ext != 'module' && $ext != 'inc') continue;

// to this <-
if($ext != 'php' && $ext != 'module' && $ext != 'inc' && $ext != 'tpl') continue;
This tells PW that tpl is a valid extension and therefore PW will search for translatable strings also inside of them.
Now those files should appear inside the translatable list of files specific to your site/ directory. If this is not the case, try to logout from the panel and log back in because PW caches this list for each session.
However if you try to add them, you can note that the JSON textdomain files generated by PW are totally empty. What’s happening now? PW parses the content of each file, searching for translation functions, specifically the following:
$this->_('text');__('text', [textdomain]);_x('text', 'context', [textdomain])or$this->_x('text', 'context');_n('singular', 'plural', $cnt, [textdomain])or$this->_n('singular', 'plural', $cnt, [textdomain]);
For this purpose, PW uses regular expressions to match these functions. However these expressions don’t recognize Smarty’s angular brackets used to wrap the functions, therefore notations like {__('translate me')} are ignored. The easiest solution is to slightly edit those regular expressions in order to ensure that those functions are not ignored. The file to edit is the class LanguageParser in wire/modules/LanguageSupport. For example, for the double-underscore __() function you can edit the regular expression around row 144, like the following
<?php

preg_match_all(	'/([\s.={(]__|^__)\(\s*' .    // __(
	'([\'"])(.+?)(?<!\\\\)\\2\s*' . 	  // "text"
	'(?:,\s*[^)]+)?\)+(.*)$/m', 		  // , textdomain (optional) and everything else
	$data, $matches[2]);
Save the file and reload the page. You will see that your translatable strings are now ready for translation.
Unfortunately, after all these efforts, the front-end is still showing the original phrases and not the translated ones. To understand what’s happening we should read carefully the paragraph that explains textdomains on the PW internationalization docs. We are using Smarty as template engine, therefore tpl files are compiled to php files and persisted in the site/assets/cache/TemplateEngineSmarty_compile folder. When PW tries to translate your strings, it searches for a textdomain that corresponds to your compiled php file and not to your original tpl file. For this reason we should manually add the textdomain in our translation functions, like the following, that references our partials/footer.tpl
<?php

__('Contact Us', 'site--templates--views--partials--footer-tpl')
Now PW can reference the correct JSON file and it will correctly translate the string.
One simple solution
The simplest solution is also the most effective. Just create a strings.php file in your templates folder and add all your translations:
<?php

__('Translate me');
__('And me');
__('And also me');
This file will correctly be detected by PW, allowing you to translate all your strings. Then you should just add the textdomain in your view files, for example:
{__('Contact Us', 'site--templates--strings-php')}You can also split the translations through different files, if you want to have them organized with some context (i.e. one file for the header and one file for the footer).
The downside of this approach is obviously that you have to duplicate the strings marked for translation.
A more specific Solution
Thanks to the comment of Jens Martsch on the previous post, I discovered the LanguageTranslatorList module by Tabea David. This module extends the ProcessLanguageTranslator.module introduced before and provides support for Smarty and Twig files as well.
However on PW, the page that should display the form for translating strings is still empty for each .tpl file. In fact the module doesn’t hook into the function that handles the URL processwire/language-translator/edit/, therefore it is still managed by PW and uses the original regular expressions.
For this reason I made a fork of the original module, adding a hook into the ProcessLanguageTranslator::executeEdit function and a SmartyLanguageParser class that contains the modified regular expressions introduced before, in order to handle Smarty’s notation.
This module should be useful enough for translating all of your files, you should however still add the textdomain to each one of your translations, due to the compilation process. You might also notice, on the setup/languages/edit/ page, that PW is still showing that inside your textdomain files there are no phrases. This is because that URL is handled by a different module, that uses the original LanguageParser class.
That’s it for this episode. In the next one, the last of the series, we are going to make the finishing touches to our website.
Stay tuned!