
Introduction
In this tutorial we will learn how to add a simple reserved area to an existing ProcessWire website, using two handy modules, an external package and a few tricks.
In short we will build a protected page on our site, where users of a specific role can log in using their credentials, see a list of documents that the administrator made available to them, and download each one using a secure link.
Notice: If you don’t where to start with ProcessWire, I suggest you to look at my 4-part series “How to build a basic webiste with ProcessWire”.
The ingredients for this tutorial are the following:
- An existing ProcessWire 3.0.62 (or higher) installation on PHP >= 5.6.0
- The LoginRegister module
- The FieldTypeSecureFile module
- The UrlSigner package by Spatie
Starting up
The FieldTypeSecureFile module module extends ProcessWire by adding a new File field which allows the user to upload files in a secure location, even outside the web root. To keep things simple however, we will configure the module to use a folder inside the web root, but we will protect it using the .htaccess file.
The module doesn’t create the folder for us, so first you need to create it manually. For this tutorial I’m going to add it at this location /site/assets/reserved. Wherever you’re going to create it, make sure that the user running the web server has write permission on it.
Later we need to change the .htaccess file. Go to Section 15 and add the reserved folder to the list of PW protected assets directories:
# -----------------------------------------------------------------------------------------------
# 15. Access Restrictions: Protect ProcessWire system files
# -----------------------------------------------------------------------------------------------

[...]
# Block access to protected assets directories
RewriteCond %{REQUEST_URI} (^|/)(site|site-[^/]+)/assets/(cache|logs|backups|sessions|config|install|tmp|reserved)($|/.*$) [OR]
[...]
Of course this operation is needed only if the secure folder is inside the webroot.
Install the modules
Next we need to install the LoginRegister module. This module is a nicely addition to the ecosystem by Ryan himself, the founder of ProcessWire.
Front-end login or register for an account in ProcessWire. Also provides profile editing capabilities.
Install the module and configure it. For our needs it is sufficient to use the Login Form and the Profile edit form (for logged users). Keep the email and password fields as they are required for both forms.
Finally we need to install the FieldTypeSecureFile module
Store one or more files in a customized location, e.g. outside of the web root
The module doesn’t have a configuration page, because the settings are applied directly to the File field that we are going to create later.
Warning: This module doesn’t officially support PW3, however in my case it’s seems to work flawlessly.
Add an alternate template for users
Following an idea of Antti Peisa, which Ryan magically put in practice supported by Avoine, we can change the template file for users, in order to add different fields, but we can also change the parent page that contains them. The whole process is described in this old blog post. The instructions are valid still today, however I suggest you to backup your site first, which is always a good practice before dealing with system templates.
Enable advanced mode in your
/site/config.phpfile by setting$config->advanced = true;.This feature turns on additional options in ProcessWire for use during ProcessWire core and/or module development.
Next, edit the “user” template (“Setup > Templates”), and do the following:
- On the Advanced tab, uncheck the box that says “Don’t allow pages to change their template?”.
- On the Advanced tab, uncheck the box that says “Don’t allow pages to be moved?”.
- On the System tab, uncheck the box that says “Disable Settings Tab?”.
- Click Save.
- On the Advanced tab, in the box that says “Duplicate/clone this template” provide a new name for the template clone. I’m going to call it
dipendente(italian for employee). - Click Save again.
Create a new template that we will use for the alternate users parent page (“Setup > Templates > Add New”).
I’m going to call it
dipendenti(italian for employees). On the “Family” tab under “Can this template be used for new pages?” select “One”. Also under “Allowed templates for children” select “dipendente” (which is the alternate user template we just cloned in the previous step).Create a new page using your new template you just created in step 3.
This will serve as the parent page for your alternate users. I’m going to create it in the root of the site, but actually it doesn’t matter where you place it. I will call it “dipendenti” (like the template).
Edit the “dipendente” template (“Setup > Templates > dipendente”) that you created in step 2.
- On the “Family” tab, for “Allowed templates for parents” select the template that you created in step 3.
- Note the id number of this template (as seen at the end of the URL in your address bar when editing the template), as you’ll need it in step 6.
Edit your
/site/config.phpfile and do the following:Replace
111with the id of the new user template that you added and replace222with the id of the new/dipendenti/parent page that you added.
<?php

$config->userTemplateIDs = array(3, 111);
$config->usersPageIDs = array(29, 222);
Go to “Access > Roles > Add New”, and add a new role.
- I’m going to call it “dipendente”, as you might have already guessed
- Under the “permissions” section make sure that it has at least
page-viewpermission on the “dipendente” template and theprofile-editpermission.
Go to “Access > Users > Add New”, and add a new user. You should now have a choice of template and parent, so you can use the new values. Assign the “dipendente” role to it.
Warning: If the new values doesn’t display in the page, try to logout and login again.
After creating a new user, you should now be able to login with that user. You can add as many other user templates or parents as you’d like using the same instructions.
Undo what you did in step 1 by turning off advanced mode.
Create the field to store protected files
Now we are going to create the field that will contain our protected files. I will use a Repeater instead of a regular File field because I want to have more control on the download process of each file.
Go to “Setup > Fields > Add New” and add a new Datetime field. Call it datestart, add a meaningful icon (e.g. fa-calendar) and set the field to open the datetime picker on focus. Also set the width of the field to 50%. Similarly add a new dateend Datetime field.
For both fields use today’s date as default. These fields, if populated, will define the time interval in which the dowload link will be valid.
Now add a new File field using the SecureFile type provided by the FieldTypeSecureFile module. Under the “Details” tab define the storage location of the files. The value I’m going to insert is ./site/assets/reserved. Notice the dot at the start of the string which indicates that the path is relative to the ProcessWire site root.
Under “Roles allowing to download a secure file” add our “dipendente” role. Then add the list of valid extensions for your file, in my case I want only documents (pdf doc docx xls xlsx txt). Finally set the maximum number of permitted files to 1. Remember that multiple files functionality is achieved using a repeater.
Now it’s time to add the Repeater field, call it protected_files and add all the fields created in the steps before (datestart, dateend, file). Under Details > Repeater item labels set this value #n: {file.name} which will instruct PW to use the index and the filename as a label. Use a meaningful icon for the field (e.g. fa-unlock-alt) and finally attach this field to our new user template “dipendente”.
Create the profile template and page
Now we are going to create the template that deals with login, profile editing and listing user files functionalities. This is the template that holds the LoginRegister module.
First we need to add a new empty PHP file in /site/templates, call it profile.php. Then head to “Setup > Templates > Add new” and check the file just created. As always add a meaningful icon (e.g. fa-user-circle-o). Finally under the “Family” tab, check “No” in the field “May pages using this template have children?” and also set that only one page is allowed using the template.
In the page tree create a new “profile” page using this template. In the “Settings” tab set it to hidden: excluded from lists and searches as we don’t want to show in the sitemap or in other places.
Create the download template and page
The download template is going to hold the logic for checking user’s permissions before downloading the file that he requested.
Again, add a new empty PHP file in /site/templates, call it download.php. Then add the template in the admin as we did before. Add an icon (e.g. fa-download) and under the “Family” set the same options like the previous template.
Then in the page tree create a new “download” page using this template. Also in the “Settings” tab set it to “hidden: excluded from lists and searches” and “not editable”.
Let’s Code
Finally it’s time to switch to the most exciting part: the code!
Point your terminal to the root of the site and install the UrlSigner package.
composer require spatie/url-signerNow that we have all of our dependencies we can wrap everthing and thight all those loose ends.
Notice: I’m going to use my TemplateEngineBlade module for the views which leverages the Laravel’s Blade templating engine, so if you are not familiar with it I suggest to head over to the GitHub page to know how it works.
First edit the _init.php file to add global reference to the profile page (which in my case it has the id 1019) that will be used in the entire site.
<?php

$view->share('profile_page', $pages->findOne(1019));
I always want the link to be present in the footer, so I’m going to add it in my partial view:
<ul>
    [...]
    <li><a href="{{ $profile_page->url }}">{{ $profile_page->title }}</a></li>
</ul>
Now we can implement the code for our profile.php template. You can find the explanation inside the comments directly in the code:
<?php

// Import the UrlSigner package
use Spatie\UrlSigner\MD5UrlSigner;

// Add Bootstrap classes to the Login form to make it more pleasant to the eye
// by hooking into render methods
$wire->addHookBefore('Inputfield::render', function($event) {
    $inputfield = $event->object;

    if($inputfield instanceof InputfieldText) {
        // add CSS classes to username and password fields
        $inputfield->addClass('form-control');
    } else if($inputfield instanceof InputfieldSubmit) {
        // add CSS classes to the submit button
        $inputfield->addClass('btn btn-primary');
    }
});

$wire->addHookBefore('InputfieldWrapper::render', function($event) {
    $wrapper = $event->object;

    $wrapper->addClass('form-group');
});

if ($user->isLoggedIn()) {
    // redirect the superuser to the panel
    if ($user->hasRole('superuser')) {
        $session->redirect('/admin');
    } else if ($user->hasRole('dipendente')) {
        // create a new instance of the UrlSigner using the PW key
        $urlSigner = new MD5UrlSigner($config->userAuthSalt);

        // The current date
        $now = new DateTime();

        $protected_files = [];

        // Here we iterate over our repeater fields
        foreach ($user->protected_files as $protected_file) {
            $start = new DateTime($protected_file->datestart);
            $start->setTimezone(new DateTimeZone(date_default_timezone_get()));

            $end = new DateTime($protected_file->dateend);
            $end->setTimezone(new DateTimeZone(date_default_timezone_get()));

            // we have to check if the datetime interval contains the current datetime
            // and if the repeater actually contains a file
            if (($start <= $now) && ($end >= $now) && $protected_file->file) {
                $file = new stdClass();

                $file->name = $protected_file->file->name;
                $file->description = $protected_file->file->description;

                // build the download url usign the UrlSigner
                // @see https://github.com/spatie/url-signer#generating-urls
                $file->url = $urlSigner->sign($config->httpHost . '/download?filename=' . $protected_file->file->name, $end);
                // This field contains when the file has been uploaded
                $file->created = $protected_file->file->created;

                $protected_files[] = $file;
            }
        }

        // share the list of files with the view
        $view->share('protected_files', $protected_files);
    }
}
Now we can build the view (profile.blade.php)
# Extend the reserved layout which contains a basic HTML structure
@extends('reserved')
@push('styles')
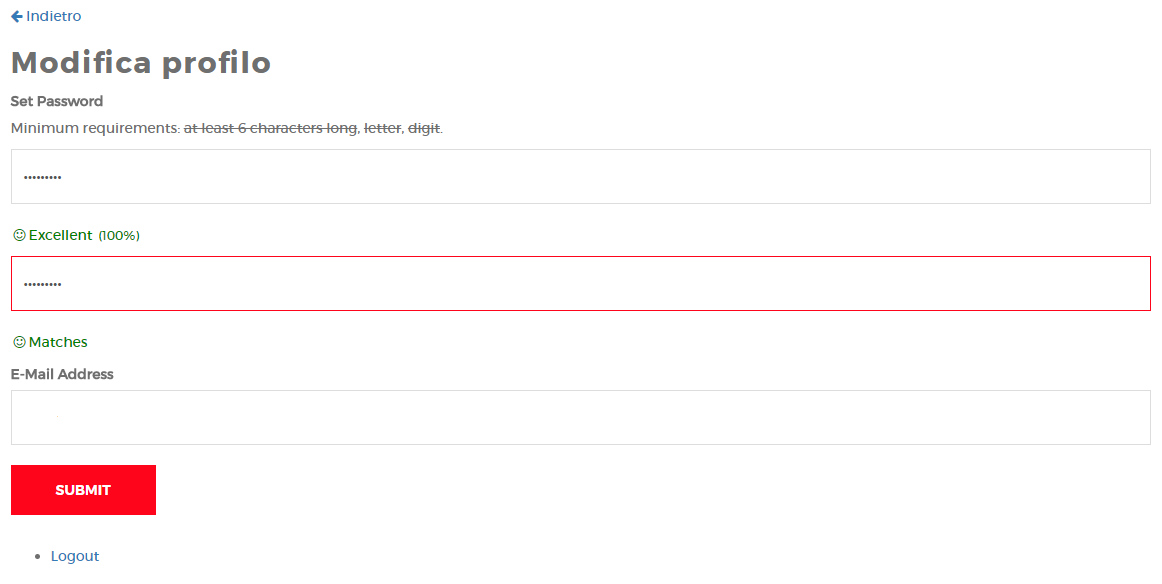
# Use PW InputField password stylesheet to style the profile edit form
<link rel="stylesheet" href="/wire/modules/Inputfield/InputfieldPassword/InputfieldPassword.css">
# Style a little bit the login error messages
<style>
.InputfieldStateError label {
color: red;
}
.InputfieldStateError input {
border: 1px solid red;
}
</style>
@endpush
@section('content')
# For simplicity we write here the header, however in general it is inlcuded as a separate file directly in the layout
@if($user->isLoggedIn())
[code omitted]
<div class="collapse navbar-collapse">
<ul class="nav navbar-nav navbar-right">
<li class="{{ ! $input->get('profile') ? 'active' : null }}"><a href="/profile">Profile</a></li>
<li class="dropdown">
<a href="#" class="dropdown-toggle" data-toggle="dropdown" role="button" aria-haspopup="true" aria-expanded="false">
{{ $user->name }} <span class="caret"></span>
</a>
<ul class="dropdown-menu">
<li><a href="/profile/?profile=1">Edit Profile</a></li>
<li role="separator" class="divider"></li>
<li><a href="/profile/?logout=1">Logout</a></li>
</ul>
</li>
</ul>
</div>
@endif
<div class="section-padding">
<div class="container">
<div class="section-title text-center">
<h1>{{ $page->title }}</h1>
</div>
<div class="row">
<div class="{{ $user->isLoggedIn() ? 'col-md-12' : 'col-md-4 col-md-offset-4' }}">
@if($input->get('profile'))
<a href="{{ $profile_page->url }}"><i class="fa fa-arrow-left"></i> Back</a>
@endif
# Integrate the LoginRegister module
@php
$loginRegister = $modules->get('LoginRegister');
$loginRegister->set('renderStyles', false);
@endphp
{!! $loginRegister->execute() !!}
# Check requirements before displaying restricted files
@if($user->isLoggedIn() and $user->hasRole('dipendente'))
# Check that there are no profile query string, so we can be sure that the we are displaying the main page of the profile
@if(!$input->get('profile'))
<hr>
<h3>Your files</h3>
<table class="table table-striped table-condensed">
<thead>
<tr>
<th>Name</th>
<th>Description</th>
<th>Uploaded at</th>
<th class="text-center">Download</th>
</tr>
<tbody>
@forelse($protected_files as $protected_file)
<tr>
<td><a href="{{ $protected_file->url }}">{{ $protected_file->name }}</a></td>
<td>{{ $protected_file->description }}</td>
<td>{{ date('d/m/Y', $protected_file->created) }}</td>
<td class="text-center"><a href="{{ $protected_file->url }}"><i class="fa fa-download"></i></a></td>
</tr>
@empty
<tr>
<td colspan="100%"><h5 class="text-center text-muted">There are no available filesi</h5></td>
</tr>
@endforelse
</tbody>
</thead>
</table>
@endif
@else
<a href="{{ $config->urls->root }}"><i class="fa fa-home"></i> Back to the site</a>
@endif
</div>
</div>
</div>
</div>
@endsection
@push('scripts')
# Use PW InputField password script to achieve in frontend the same admin functionality
# for changing passwords (complexity indicator, matching confirmation, ...)
<script src="/wire/modules/Inputfield/InputfieldPassword/InputfieldPassword.js"></script>
<script src="/wire/modules/Inputfield/InputfieldPassword/complexify/jquery.complexify.min.js"></script>
@endpush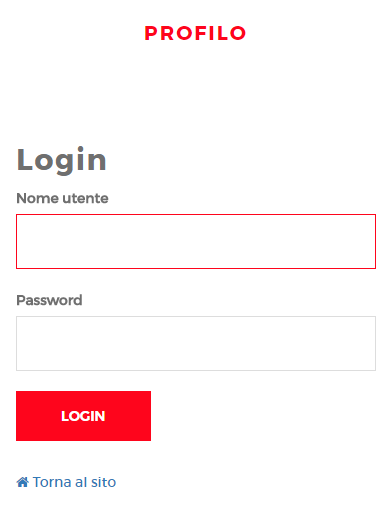
Notice: If you need to disable the login to one of your users, just check the “Not published” field under the “Settings” tab.
Finally the last step is to include the code for handling the download links generated in the profile page.
<?php

use Spatie\UrlSigner\MD5UrlSigner;

// check if the user is logged in and has the correct role
if($user->isLoggedin() && $user->hasRole('dipendente')){
    // get the full url of the request, including query strings
    $url = $config->httpHost . $input->url(true);

    // create a new instance of the UrlSigner class
    $urlSigner = new MD5UrlSigner($config->userAuthSalt);

    // if the url is not valid (is expired or has been tampered)
    if (! $urlSigner->validate($url)) die("The url is expired or it has been invalidated!");

    $filename = $input->get('filename');

    // find the requested file in the list of protected files of the user
    $repeater = $user->protected_files->findOne("file.name=$filename");

    if ($repeater) {
        // additional control provided by the FieldTypeSecureFile module
        // Returns true if the current user is allowed to download
        if ($repeater->file->isDownloadable()) {
            // log to a custom log file that the user has downloaded the file
            $log->save("download", sprintf("User %s downloaded the file %s", $user->name, $repeater->file->name));

            // finally send the file to the user
            $repeater->file->download();
        }
    }
}

// in every other case redirect to the profile page for login
$session->redirect('/profile');
That’s it! Our reserved area is completed. Remember also to add the profile page to the list pages that are not crawlable by search engines.
User-agent: *
Disallow: /profile
(Edit 2018-04-21)
By default removing a User doesn’t delete his files as well, because they are attached to a repeater which is a different page. This functionality however is easy to achieve using hooks. You can insert an hook before the page deletion event in your /site/ready.php file for this purpose. For an example take a look at this code:
<?php

$this->addHookBefore('Pages::delete', function(HookEvent $event) {
    // get the page from the event
    $page = $event->arguments(0);

    if ($page->template->label === "Dipendente" && $page->template->pageClass === "User" && $page->protected_files) {

        foreach ($page->protected_files as $protected_file) {
            if ($file = $protected_file->file->first()) {
                // get the complete path of the file
                $filepath = $file->get('pathname');

                // get the directory path
                $path = dirname($filepath);

                // remove all files from the folder, but not nested ones. We are good with it
                array_map('unlink', glob("$path/*"));

                // remove the directory
                rmdir($path);
            }
        }
    }
});